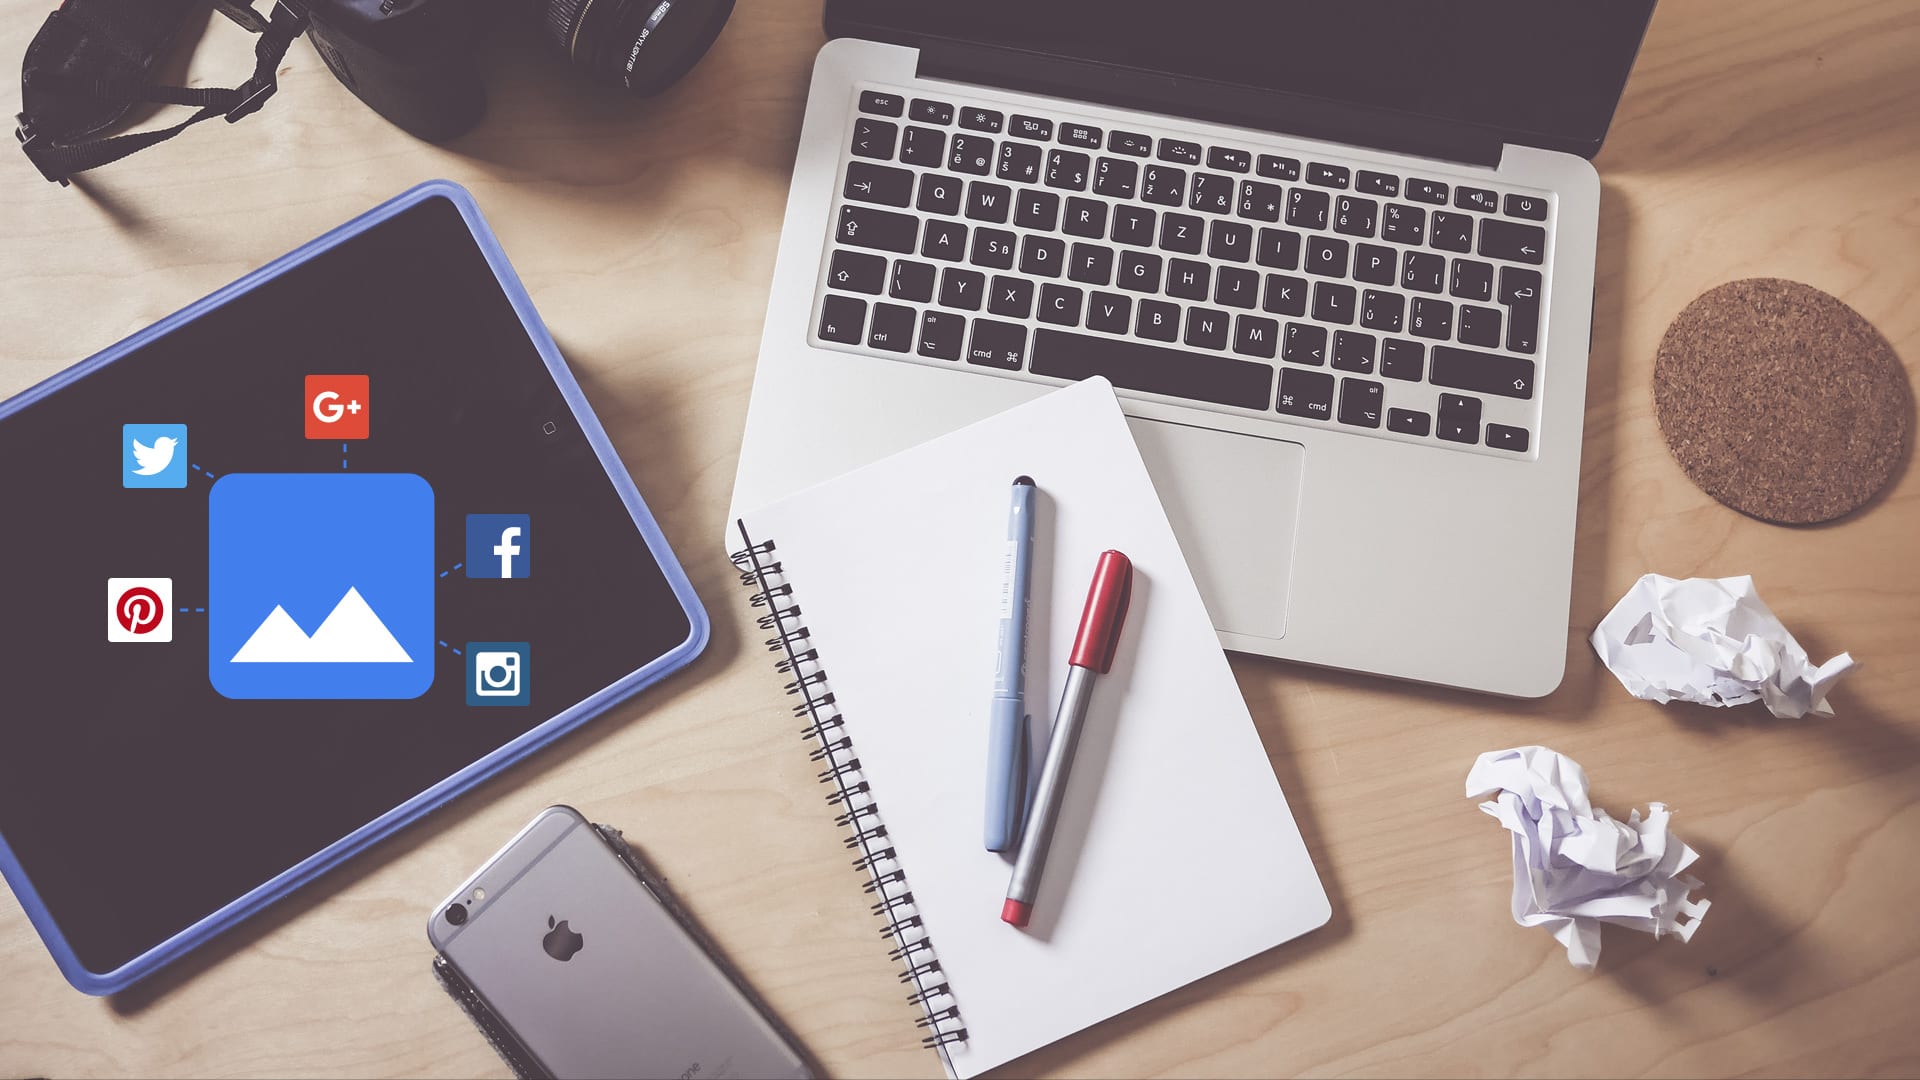
Everyone is doing visual content these days. Follow these image creation tips and leave them in the dust.
Smart bloggers, social media stars and marketers alike have caught on to the visual content trend. Have you?
It’s clear that visual content allows you to grab more eyeballs, yields more engagement and performs better long-term for your digital marketing efforts. But the longer this trend is around, the harder it will become to stand out.
And for most bloggers and social media pros, creating images or social media graphics is time consuming and tedious work.
With this post, I hope to help you create a workflow and give you some tips to help you create and optimize your social media images.
You can almost call this a minimum viable workflow for social media images. And I’m telling you first-hand, it works!

Step 1: Choose Your Tools
Every good artist or craftsman needs to have good tools. And there are different tools for different jobs. Furthermore, there are different tools for different people for different jobs.
You may not feel as comfortable with some tools, but thrive with others. That’s okay. The key is to find the tools that work best for you.
For the sake of time, I’m going to stick to the three tools that I believe are the most effective for different reasons and use cases.
- SoVisual.co: Simplest to use.
- Canva: Moderate ease of use, moderate control.
- Photoshop: Hardest to use (if you’re not experienced), maximum control.
For more tools take a look at my list of desktop tools and mobile tools for image creation.
The above-mentioned tools will work for the majority of people’s needs, so I recommend giving them all a try and seeing which one you feel most comfortable with.
Step 2: Decide the Content
What are you going to put on the social media image? Will it be quote? Will it be the title of a blog post?
Or in other words, what is the message you’re trying to get across?
You need to know what your content is going to be first and foremost because the point of a good visual, above all else, is to communicate a message.
But knowing the content isn’t the only thing you should have in mind. You also want to know and understand the emotional tone behind it.
Understanding the emotional tone will help you sort more quickly through some of the elements that will go into creating the visual such as:
- Typography: Certain fonts will communicate different emotional tones
- Color: Colors communicate to our brain and can instantly put the viewer in an emotional state
- Imagery: The photos or dominant graphic(s) you use can have a significant effect on the tone
Know your message, know the tone you want to set, and then proceed to the next step.
Step 3: Source the Images
If you are going to add imagery as a background or visual accompaniment to the message, you will want to have a handful of go-to resources to find and discover images.
You can of course use one of my top sites to find free images post. I also recommend using your browser’s Favorites or Bookmarks feature to save your preferred places to sources images.
A few tips to keep in mind when sourcing your images:
- Remember the tone of your message (as I said above) and make sure the image you use connects in some way.
- Always make sure the image you’re using is legal to use— don’t just use any old image you find on Google search.
- Make sure the image you source is a minimum of 2000px wide and 1080px tall. More on this later.
It’s really easy to find yourself spending an hour just looking for the “perfect” image. This can be a huge time-suck. And the next time you need to create an image, you’ll dread it because you’ll remember how time-consuming this part can be.
So set that time limit (10 minutes) and decide that you will find an image in that amount of time.
Step 4: Put it Together
Using the basic rules of visual content creation, it’s time to make your graphic piece. This is where the real work begins.
To get the most bang for your buck (so-to-speak) you need to create a minimum of 3 sizes for this image:
- Landscape (1200×630)
- Portrait (1080×1350)
- Square (1080×1080)
But if you have the extra time and energy, I also recommend making a 1920×1080 version. This is the perfect 16:9 ratio image that has the most universal visual appeal. The only places it can’t be used are as a Facebook Open Graph image and on Instagram. Everywhere else online, it works like a charm.
Now, it also helps if you have already gotten your hands on some social media image templates to make this process more streamlined. While 2/3 of the tools I will talk about below will have templates for you, it’s still good to have your needed sizes in mind.
Using SoVisual.co
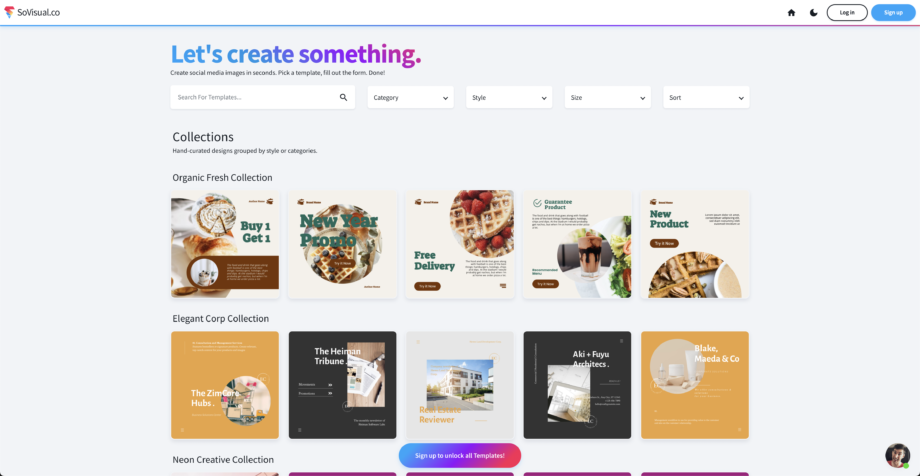
SoVisual.co is the newest visual content creation tool on the market. It offers the simplest (and fastest) process for creating images. However, it also offers the least amount of control over the creation process.
That’s not necessarily a bad thing.
SoVisual.co gives you access to a huge library of professionally made design templates. You browse through the feed, select the design you like, and then you can customize the content. You can customize:
Once you’ve done that, you can instantly have the app crank out 3-5 different sizes made to cover all your bases in social media. That is where this tool really shines.
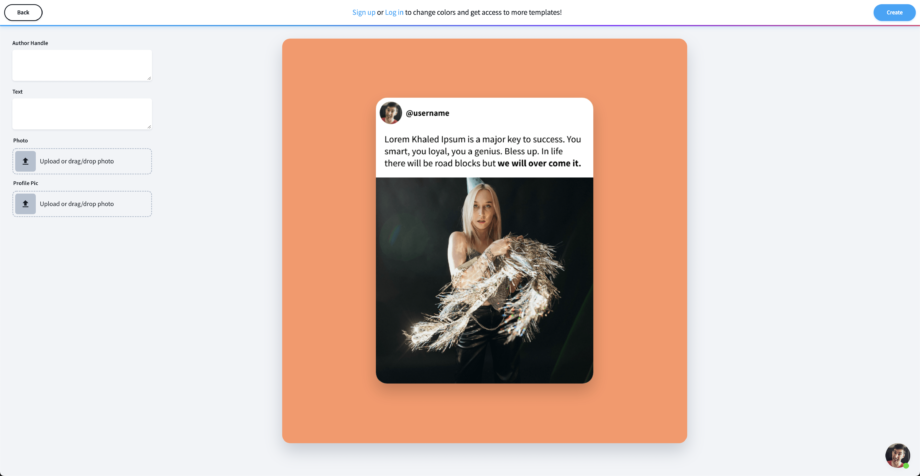
By automatically taking care of the primary design elements and resizing for each network for you, you save a ton of time.
The drawback is you have less control over modifying the size of text, spacing, positioning and other design elements. If you’re just looking to get the job done and not fiddle with tiny details, this is probably the best tool for you.
Using Canva
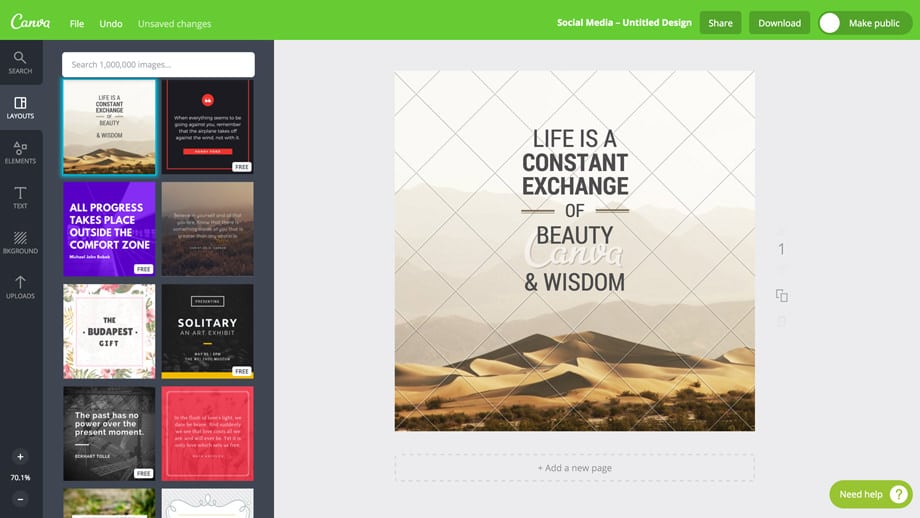
This is like the best of both worlds tool. Canva gives you all the tools you need to customize your image without being overwhelming.
You can start with one of their size templates and then chose from their professionally designed layouts. Once you pick a layout, you can customize pretty much everything about it.
Now, you don’t have as many fine-tuning design controls as you would with Photoshop, but that is both a strength and a weakness of the tool. Enough to do what you want, but not enough to suck you into a black hole of options exploring and tweaking.
However, unless you have Canva for Work, you will not have the ability to automatically resize images for all your social media needs. The free Canva user will need to create each size image separately.
This can be a lot more work. If you’re going to be creating a lot of images for social media, then Canva for Work is definitely worth the cost.
Using Photoshop
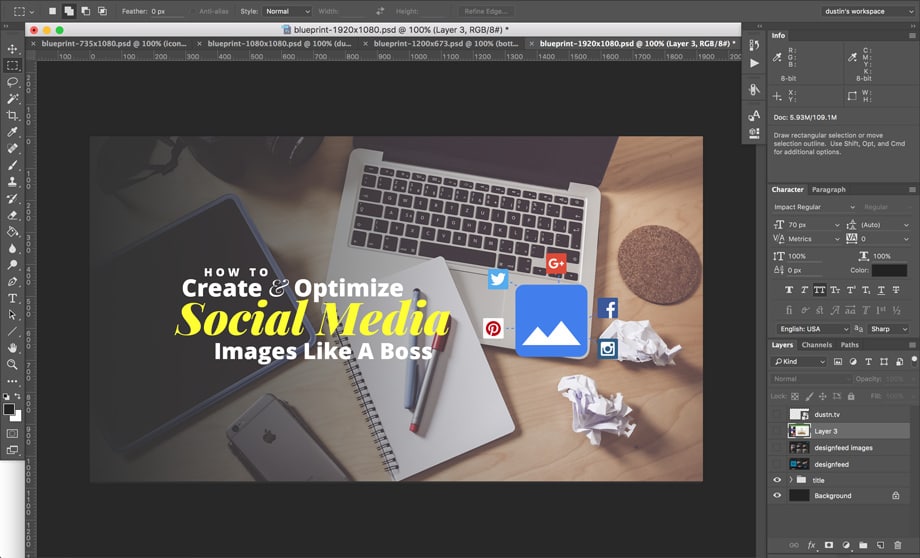
If you’re using Photoshop, you have a full suite of design tools to fine-tune and customize your images to every last detail. It is the most popular design standard software used by professional designers for decades.
However, unless you have been using Photoshop for a while, you may get overwhelmed by how many options. The learning curve is quite steep and it could take you a year or so working with it to get comfortable and quick.
Now, using Photoshop there is a trick you can use when creating your social media images.
A while back I discovered the glorious world of Photoshop scripts. Basically, if you’re familiar with javascript you can create scripts that will automate certain things in Photoshop.
One particularly helpful script I discovered is called Duplicate to All and it allows you to select a layer and have it duplicated (pasted) to every open file.
So here’s how this workflow works:
- Open 4 separate photoshop templates (mentioned above).
- Create the image on the biggest template (1920×1080).
- Once finished with that one, put all layers into a group and use the Duplicate to All script to place that group on all templates.
- Tweak the layers on each file to make it line up correctly for each different template.
- Save each template separately (JPEG and PSD versions).
This might actually seem like more work, but I’ve found it to be a much better workflow. You not only get better results, but you have a PSD for each version so you can always reopen if you need to make changes.
Step 5: Optimizing Images
There are two things that we need to talk about when optimizing your images. The first is pretty obvious to some, but the second may not be.
- File size optimization
- Search engine optimization
Both of these steps are a crucial part in making sure your images are giving you the greatest return on investment.
Image File Size Optimization
Everyone knows that a slow loading page is not ideal for user experience. It’s also bad for SEO. So when adding images to a blog post or page, you want them to be as lightweight as possible without losing image quality.
Even if you’re only planning on sharing these images on social media, you still want to optimize them to be as lightweight as possible. Why?
When you upload an image to a social network, they are going to optimize it themselves. If your image file size is massive and unoptimized, the more the network will have to do in order to reduce its size and loading time. And you can’t always trust them to preserve the image quality that you’ve worked so hard on.
Facebook is especially brutal when it comes to image quality loss.
So do some of the work up front and you’ll save as much quality loss as possible.
Reducing File Size with Photoshop
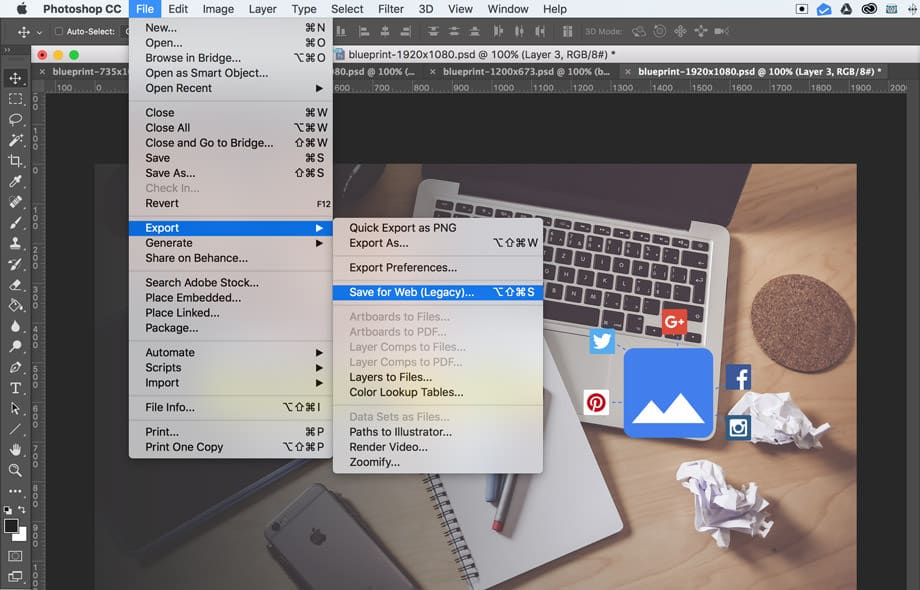
If you’re using Photoshop, you have a bit of control in reducing the file size when you “Save for Web and Devices”.
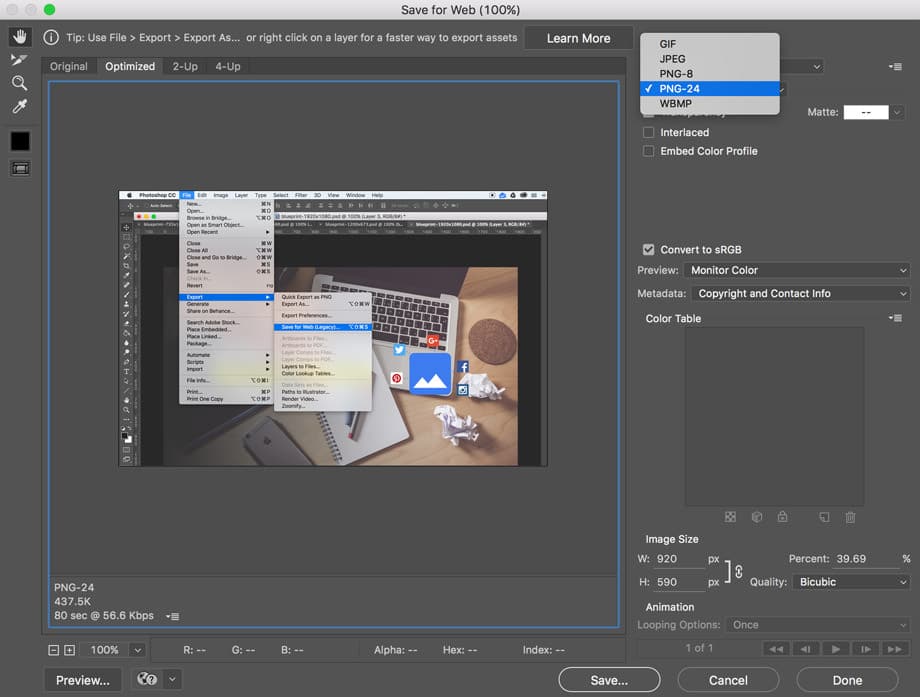
Your first step is to choose between saving as a JPEG or PNG. Depending on the image, one may be better than the other. So first select PNG and take a look at how big the file size will be. Then switch to JPEG and see what the file size will be.
With JPEG selected you can also tweak the quality settings to reduce the file size further. I don’t recommend going below 70% or else you will likely see a visible degrading of quality.
After looking at these settings, choose the file type that has the lowest file size.
Other Tools to Reduce File Size
There are plenty of apps, plugins and web services that will help you reduce your file sizes even further. Here are some recommended tools:
Personally, I use JPEGmini and that’s all I need. If you’re not a Mac user though, this will not be an option for you.
Image Search Engine Optimization
Many people overlook this step because they simply aren’t aware of how powerful it can be. They also don’t realize just how big a problem it is to have poor image seo.
Trust me, optimizing your images for search can not only improve your overall search ranking, but can drive traffic as well.
This, of course, only applies if you’re loading them on your blog, but it’s a good habit nonetheless.
Optimize Your Filename
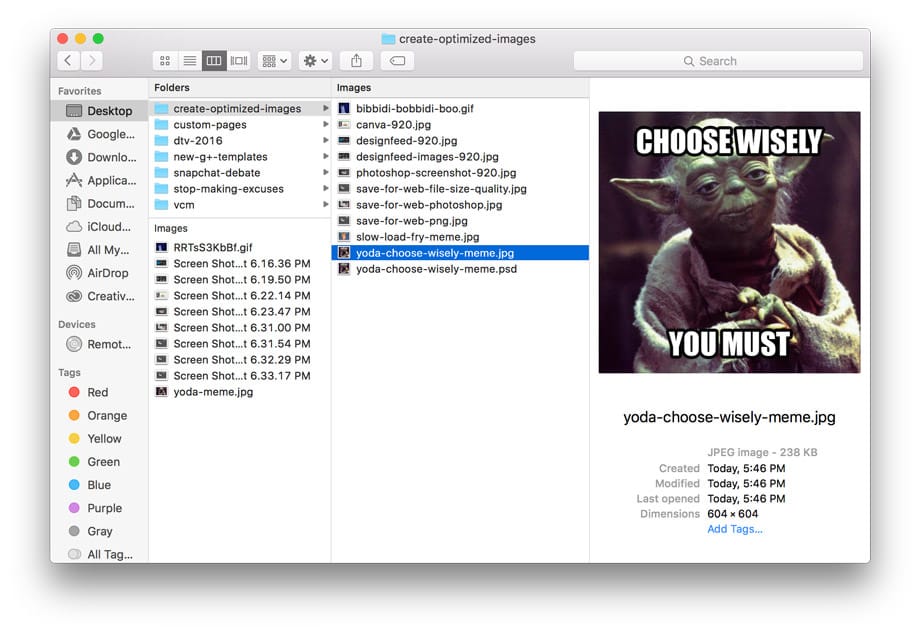
First, be sure that your filename contains a descriptive keyword or phrase that summarizes the image. So if your image is a meme of Yoda, name it something like yoda-choose-meme.jpg.
Don’t make it super long, just enough to get the job done.
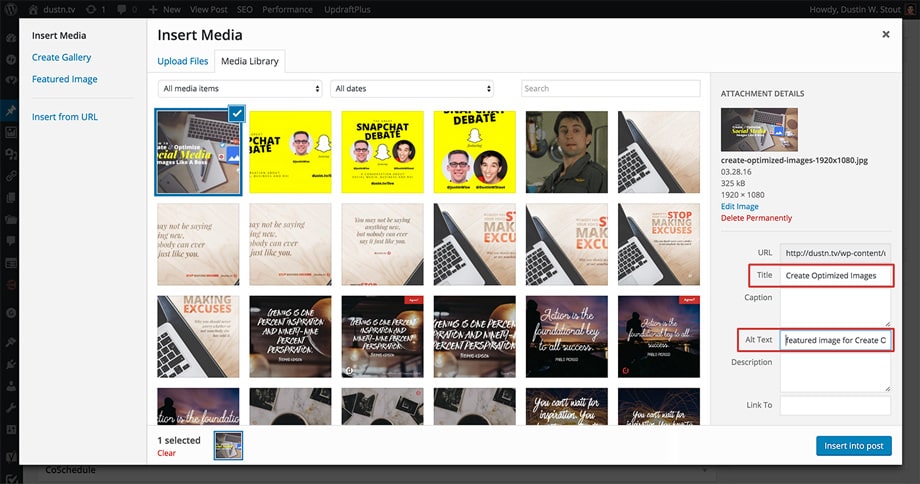
Add the Alt Tag
The Alt tag is primarily used by screen readers for the visually impaired. This is is meant to describe the image in a useful way to someone (or something) that can’t actually see the image.
In WordPress it’s very easy to set an Alt tag when you upload an image. Do this every single time. No exceptions.
This is not only good for the visually imaired and search engines but if anyone happens to pin this image, that Alt tag is what Pinterest will automatically fill the Pin description with.
Keep your alt tag to 125 characters or less. This can be a bit more descriptive than the filename but not a full-on description.
If you’re not using WordPress, you can use HTML in your editor of choice, here’s what that would look like:
<img src="IMAGE URL" alt="YOUR ALT TAG HERE" />
And no, it should not be in all caps. I did that just so you can easily see where it goes.
Write Your Title tag
Just like the alt tag, the Title tag is easily overlooked. This is what will show up when someone hovers their mouse over your image and they get that little popover bubble.
Again, WordPress makes this very easy to add, but if you’re using something else or doing this manually through HTML, here’s what it would look like:
<img src="IMAGE URL" alt="YOUR ALT TAG HERE" title="YOUR TITLE TAG HERE" />
Your title tag should also be in title case— first letter of each word Capitalized, just like the title of a blog post. And also, just like a good blog post title, try to keep it to 60 characters or less.
For a more in-depth look at Alt tags and Title tags, Yoast has a fantastic article that I highly recommend.
Conclusion
Getting your content to stand out in today’s dizzying overload of content doesn’t take much. You just need to have a little more insight and be willing to do a little more work than the next guy or gal.
Knowing these simple social media image optimization and workflow tips will help you begin cranking these things out with greater effectiveness and the highest possible efficiency.
As a recap, here’s what you need:
- Pick the image creation tool that works for you
- Decide on the content
- Source the images or primary visual aids
- Put it all together (using your tool of choice)
- Optimize the file name
- Optimize the file size
- Upload the image
- Add alt tag (if applicable)
- Add title tag (if applicable)
Once you’ve done this a handful of times, it will be like second nature. Done consistently over time, this can be a highly impactful strategy for getting your content discovered by a much wider audience.
So which image creation tool is your favorite? Is there anything you read above that was completely new to you? You can leave a comment by clicking here.
Leave a Reply
You must be logged in to post a comment.